How to Build a Bluetooth-Controlled RC Car Using Arduino UNO, HC-05, and L298N Motor Driver
Building a remote-controlled car is an exciting way to dive into robotics and electronics. In this project, we’ll guide you through creating a Bluetooth-controlled car using an Arduino UNO, HC-05 Bluetooth module, and L298N motor driver.
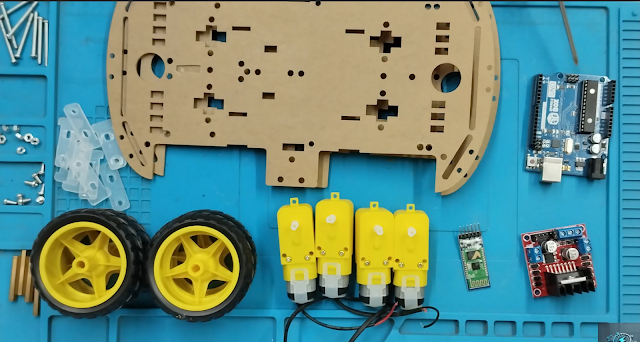
Step 1: Components You’ll Need
- Arduino UNO – The brain of your car.
- HC-05 Bluetooth Module – For wireless communication.
- L298N Motor Driver – To control motor speed and direction.
- DC Motors – Two or four motors for your wheels.
- Car Chassis – A sturdy frame for your car.
- 5V power bank– To power the motors.
- Jumper Wires – For connections.

Step 2: Circuit Connections
HC-05 to Arduino:
- VCC → Arduino 5V
- GND → Arduino GND
- TX → Arduino RX (Pin 0)
- RX → Arduino TX (Pin 1)
L298N Motor Driver to Arduino:
- Motor-1-FW, Motor-1-BW→ Arduino Pins 8, 9
- Motor-2-FW, Motor-2-BW → Arduino Pins 10, 11
Power:
- Connect the 5v power bank to the motor driver’s power input.
- Share the ground between the battery and Arduino
Step 3: Write the Code
Use the Arduino IDE to upload the code. Here’s a snippet for controlling the motors:
// Pin definitions
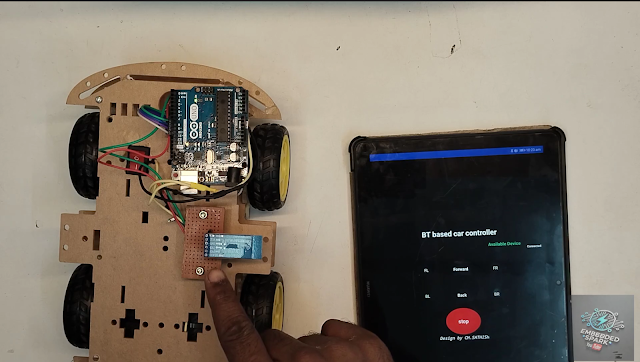
Step 4: Control with Your Smartphone
- Install a Bluetooth control app like Bluetooth Controller or Serial Bluetooth Terminal.
- Pair your smartphone with the HC-05 module (default password: 1234 or 0000).
- Use commands like F (Forward), B (Backward), L (Left), R (Right), and S (Stop).

Step 5: Test Your Car

Once everything is connected and the code is uploaded, place your car on a flat surface and start sending commands via the Bluetooth app. Watch it zoom forward, turn, and stop!
Conclusion
This Bluetooth-controlled RC car project is an excellent way to learn about embedded systems, motor control, and wireless communication. With just a few components and some programming, you can build your very own RC car.
If you want to create your project use :
YouTube Video link: https://youtu.be/C7xw1KN9w74
Have questions or need help? Drop a comment below or check out our video tutorial for a detailed walk through!


Comments
Post a Comment